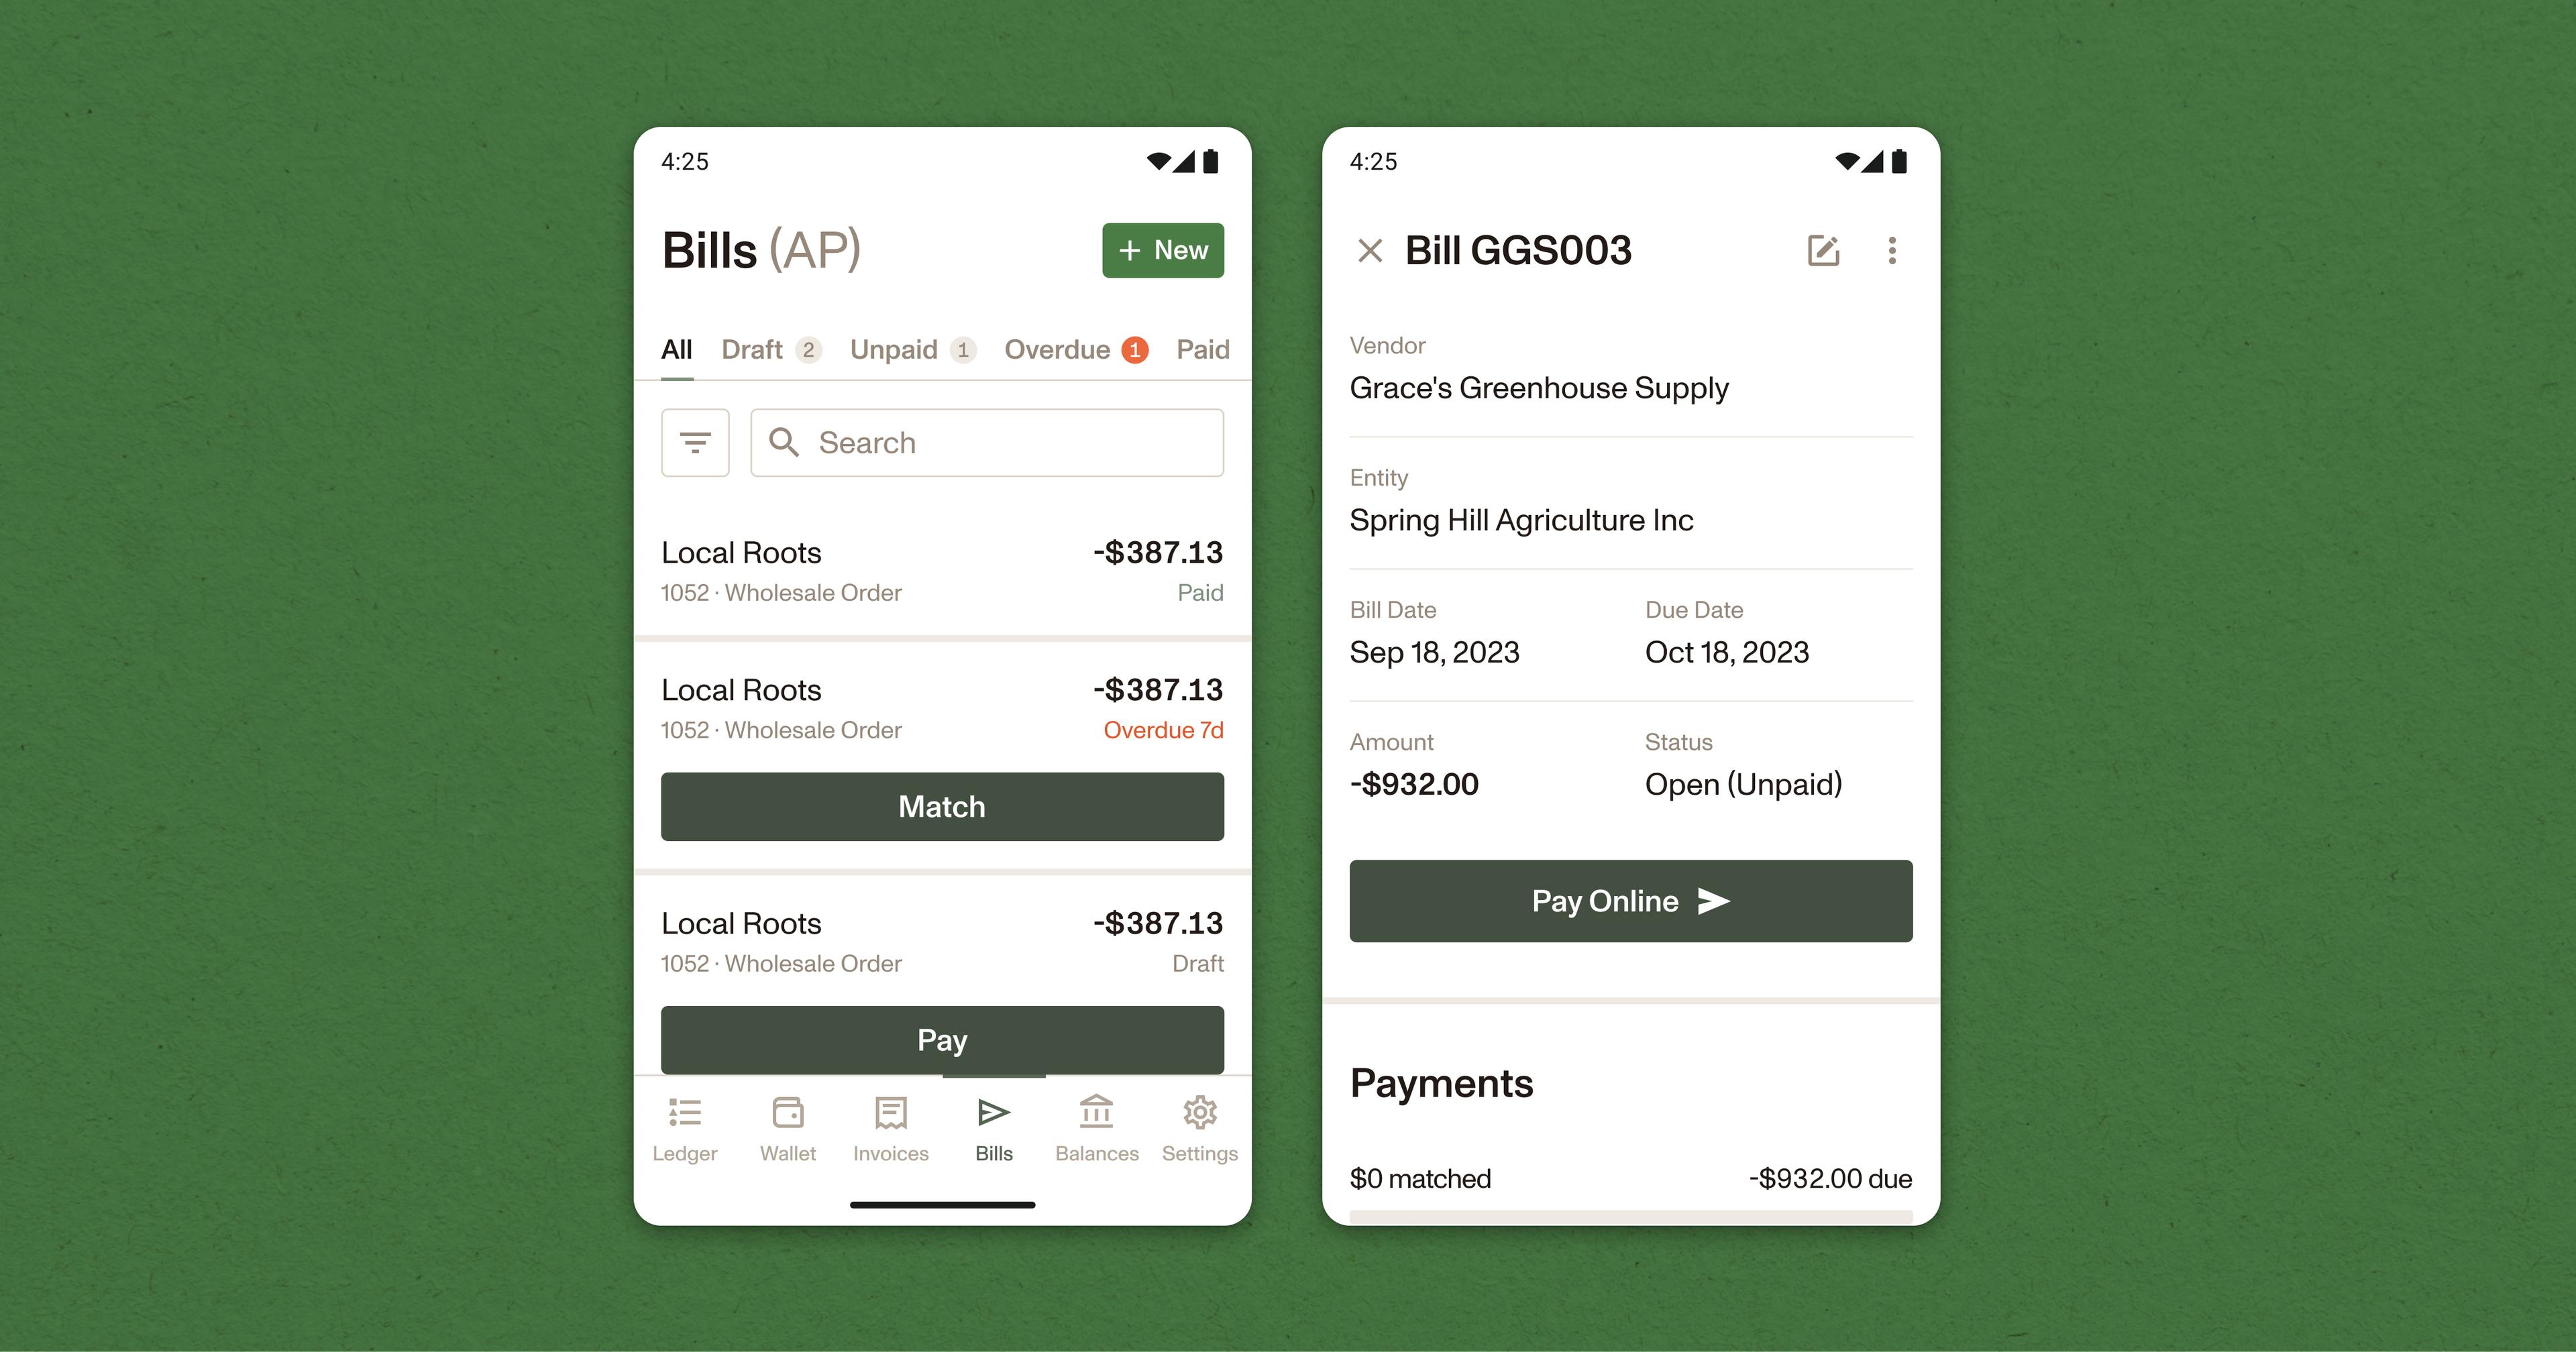

Build a payments workflow where estimates convert directly to invoices and all your documents are accessible in one place, so it’s easier to keep track of jobs and get paid for your work.
Introduction
Estimates are the starting point for almost every construction job. They help contractors and clients get on the same page about scope of work and how much a project is expected to cost. For some operators, estimates also act as an informal work order to help keep track of the job. And finally, once work officially begins, contractors collect payments by turning estimates into invoices.
The process of creating an estimate, sending it to the customer, and converting it to an invoice sounds simple. But as we’ve heard from Ambrook customers like Roper from Bottom Line Fence or Paul from WhiteWater Ranch, things can get tedious if you’re building PDFs by hand or manually emailing estimates to clients. This is especially the case as your business scales or when you’re taking on many jobs simultaneously.
Roper, Paul, and their crews developed systems that made estimates, invoices, and client payments easier to reuse and track across their operations. This lesson walks through how you can also create a simple estimate-to-invoice workflow that’s easy to repeat, so you get more time back for the work itself.
Learning Outcomes
In this lesson, you will…
Review the difference between estimates, quotes, bids, proposals, and invoices
Set up a reusable estimates workflow with saved line items, overhead, and profit
Turn an approved construction estimate directly into an invoice
We’ll also cover how to track estimates and their corresponding invoices in one place.
Step 1: Choose an Estimate, Quote, Bid or Proposal
Estimates are used before you start work, so the client understands how much they can expect the job to cost and give their approval. But estimates aren’t the only type of pre-sale or pre-work agreement in construction. Contractors also send bids, quotes, or proposals depending on the job.
These documents have very similar formats (they all show line items and pricing), and the steps in this lesson will apply to all of them, but there’s some variation in what they communicate to your client. So, how do you know which one to choose?
Here’s our brief comparison of estimates, quotes, bids, and proposals.
| Document | What It Is |
|---|---|
| Estimate | Your best, approximate calculation of what a job will cost based on expenses like labor and materials. |
| Quote | A fixed price you’re committed to completing a job for, based on expenses like labor and materials. |
| Bid | Like a quote, but typically a more formal document that you submit against other vendors who are competing for the same job. You’re offering to perform a defined scope of work at a specific price. |
| Proposal | Like a quote or bid, but typically including a more formal write-up of the scope of work, terms, timeline, and approach you’re offering to perform for a job. Proposals are usually submitted for larger jobs and clients. |
Choose the document type that makes the most sense for your job and client. Then, you’re ready to create your first one.
Here’s how to start a new estimate in Ambrook:
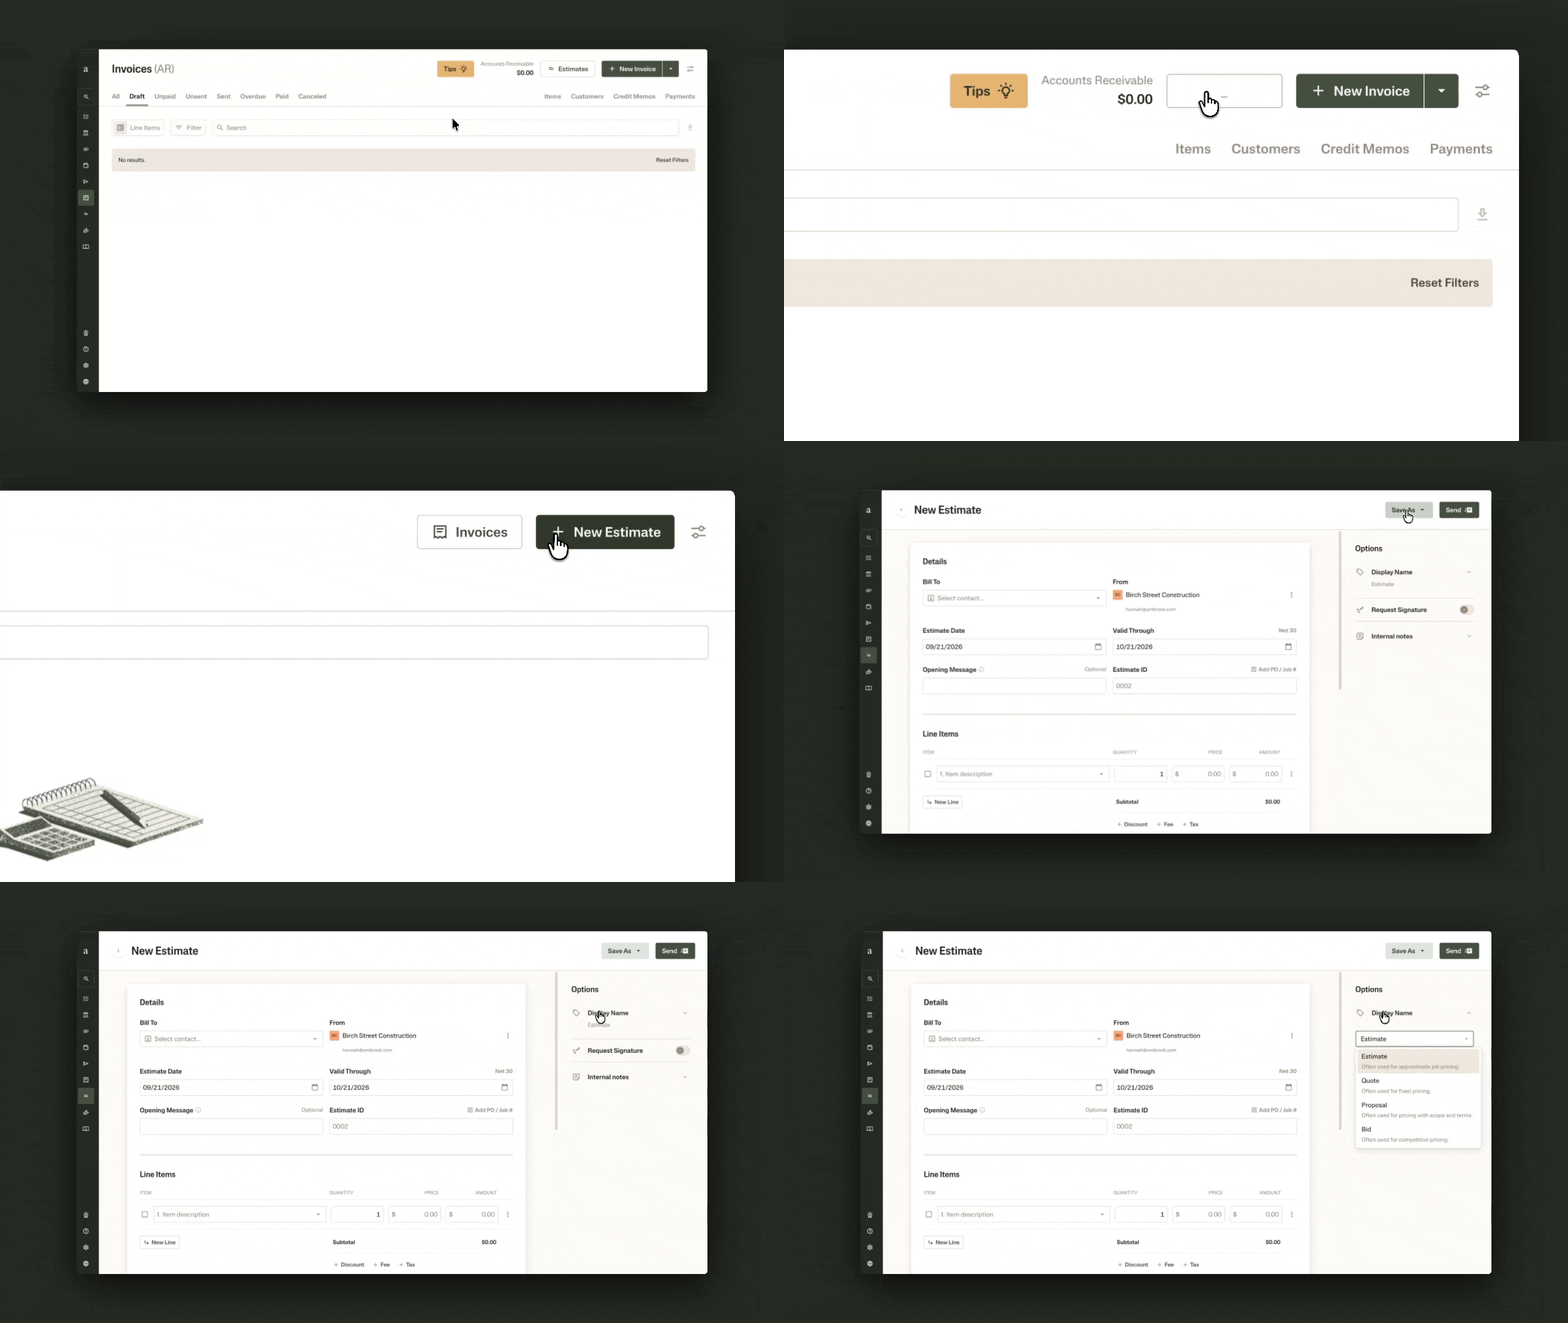
Go to Invoices in your left menu bar. Then, in the top right, click Estimates.
Now, you’ll see the option to select New Estimate in the top right corner.
If this is a quote, bid, or proposal, find Display Name on the right side of the screen under Options. Open it, then select the right document type from the dropdown.
Fill in the contact information for your client, estimate and expiry dates, the estimate ID, and an optional message.
In the next step, we’ll fill out the heart of the estimate: line items.
Note: We’ll continue to use the term “estimate” throughout this lesson, but the following instructions also apply to quotes, bids, and proposals.
Step 2: Break Down (and Save) Your Line Items
Line items are the core part of your estimate. What will it take to complete the job in question, from materials to labor and subcontractors to specialized equipment?
For this first estimate, jot down a list of the applicable costs, including for each if they apply:
Price per unit
Tax rate
Fees (like overhead and margin)
For example, your line items could include:
Cost of your crew’s labor, including their wages, taxes, overhead, and margin
Cost of materials, with a percentage fee added for your margin
Cost to hire subcontractors, with a percentage fee added for your margin
If you often work with the same materials, this is also a good time to think about saving a library of line items you might reuse for future estimates. This means you won’t have to manually retype item names or sale prices every time, so the next estimates you create will go much faster.
In Ambrook, you do this using the item catalog. Let’s walk through how it works as we continue filling in our estimate:
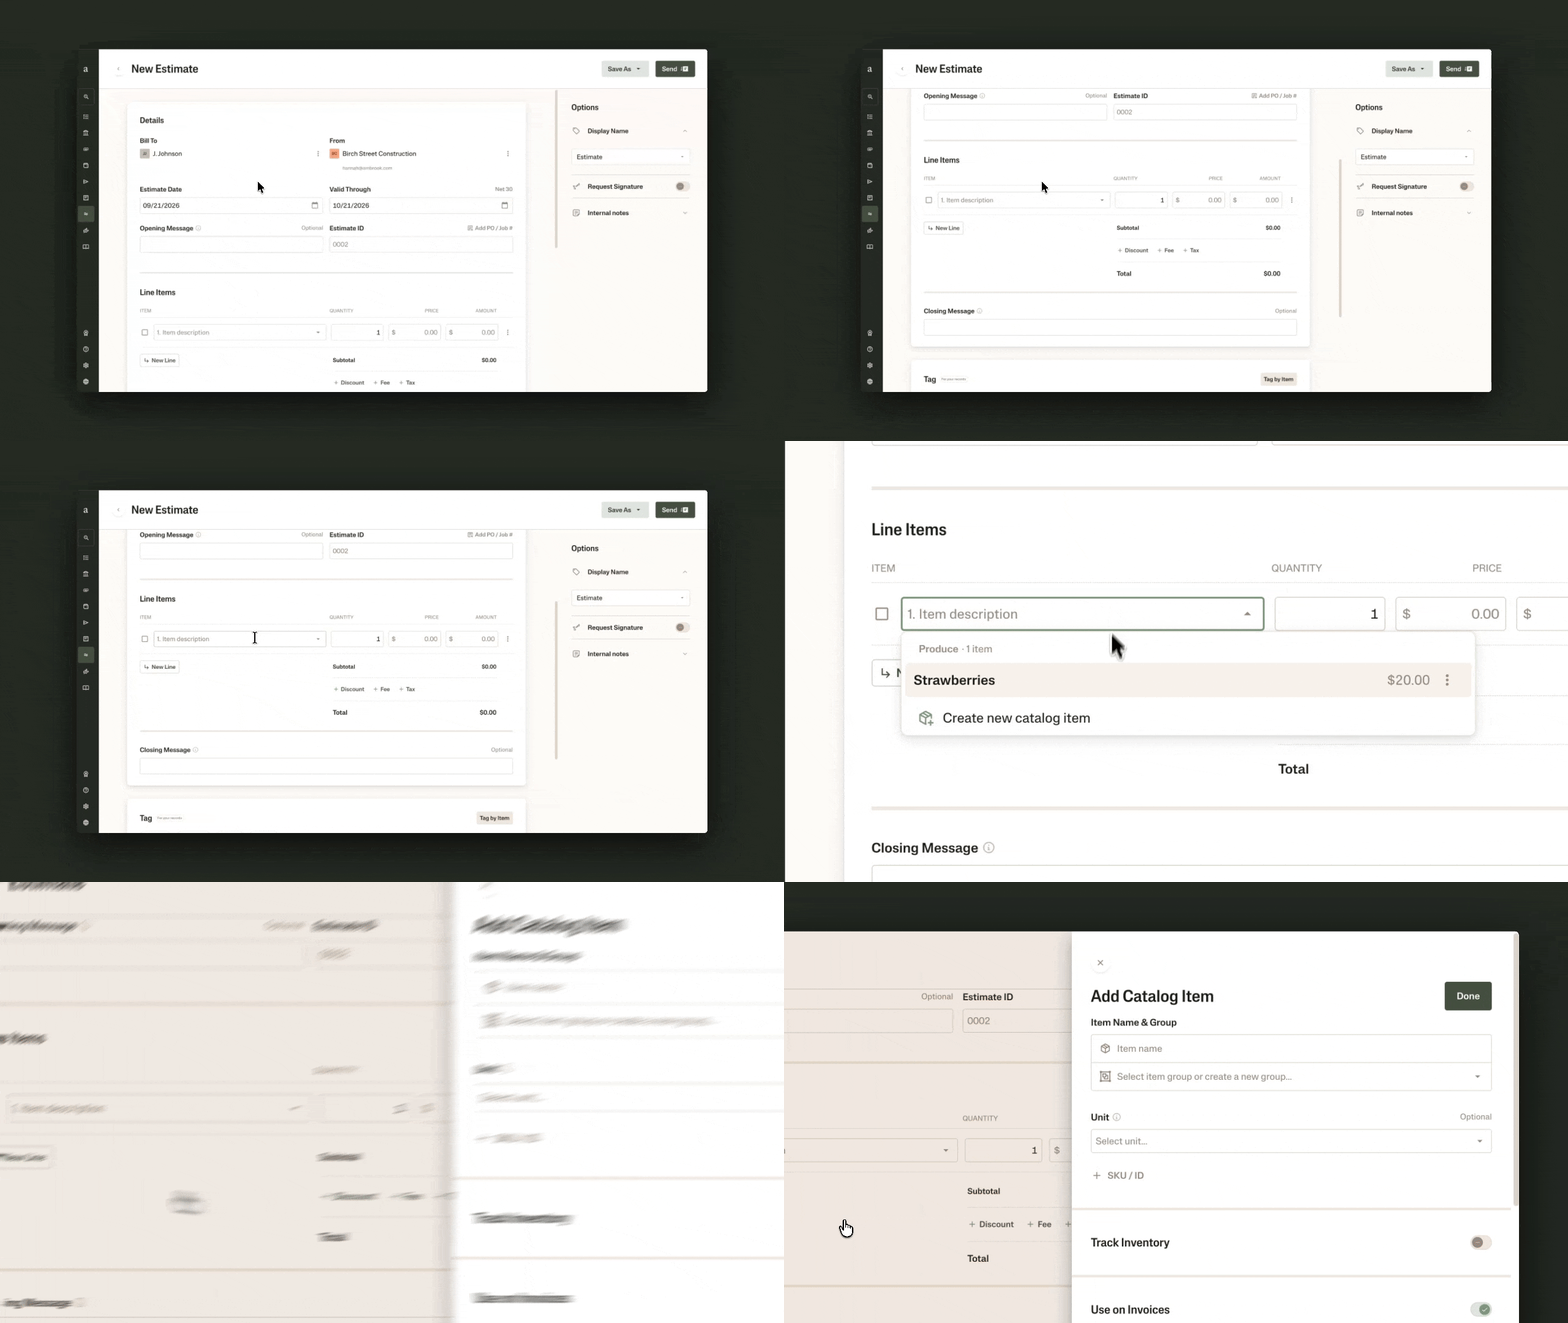
In the Line Items section of the estimate, start adding your first line item by typing into the Item description box.
If this is a one-off line item that you don’t expect to use again, continue to fill in quantity, price, and amount for that line.
If this is an item you want to save for use in future estimates, click on the Item description box and select Create new catalog item. This opens a side window, where you’ll save information including the item’s name, unit, sale price, and fees.
Add as many line items as you need by clicking New Line. If you’ve saved a catalog item, you’ll now see it as a dropdown option under Item description.
Under the Subtotal line, add any other discounts, fees, or taxes at the overall estimate level.
You can optionally add a message to show under your line items or any relevant attachments.
Step 3: Send and Track the Estimate
Now that your estimate is complete, it’s time to get things over to your client for approval. Here’s how this part of the process works in Ambrook:
Under Options on the right side of the screen, toggle on Request Signature if you’d like your client to sign for their approval of the estimate.
In the top right corner, click Send. Review the client’s contact details, then select Send Now if everything looks ready.
Your client will get an email with an online link to review the estimate. There, they have the option to accept, reject, and download the estimate as a PDF.
Back in Ambrook, you now have a built-in Estimates dashboard that automatically helps you keep track of the estimates you’ve drafted, sent, or canceled, plus the ones customers have formally accepted.
This gives you one place to log the sales you have in progress, check how long estimates have been waiting for approval, and scan for customers you need to follow up with, all without having to dig through emails or messages yourself.
Step 4: Convert an Accepted Estimate to an Invoice
Once a client accepts your estimate and you start working on their project, you’ll want to convert the estimate to a matching invoice so you can get paid for the job.
A software like Ambrook will do most of the work to generate your invoice:
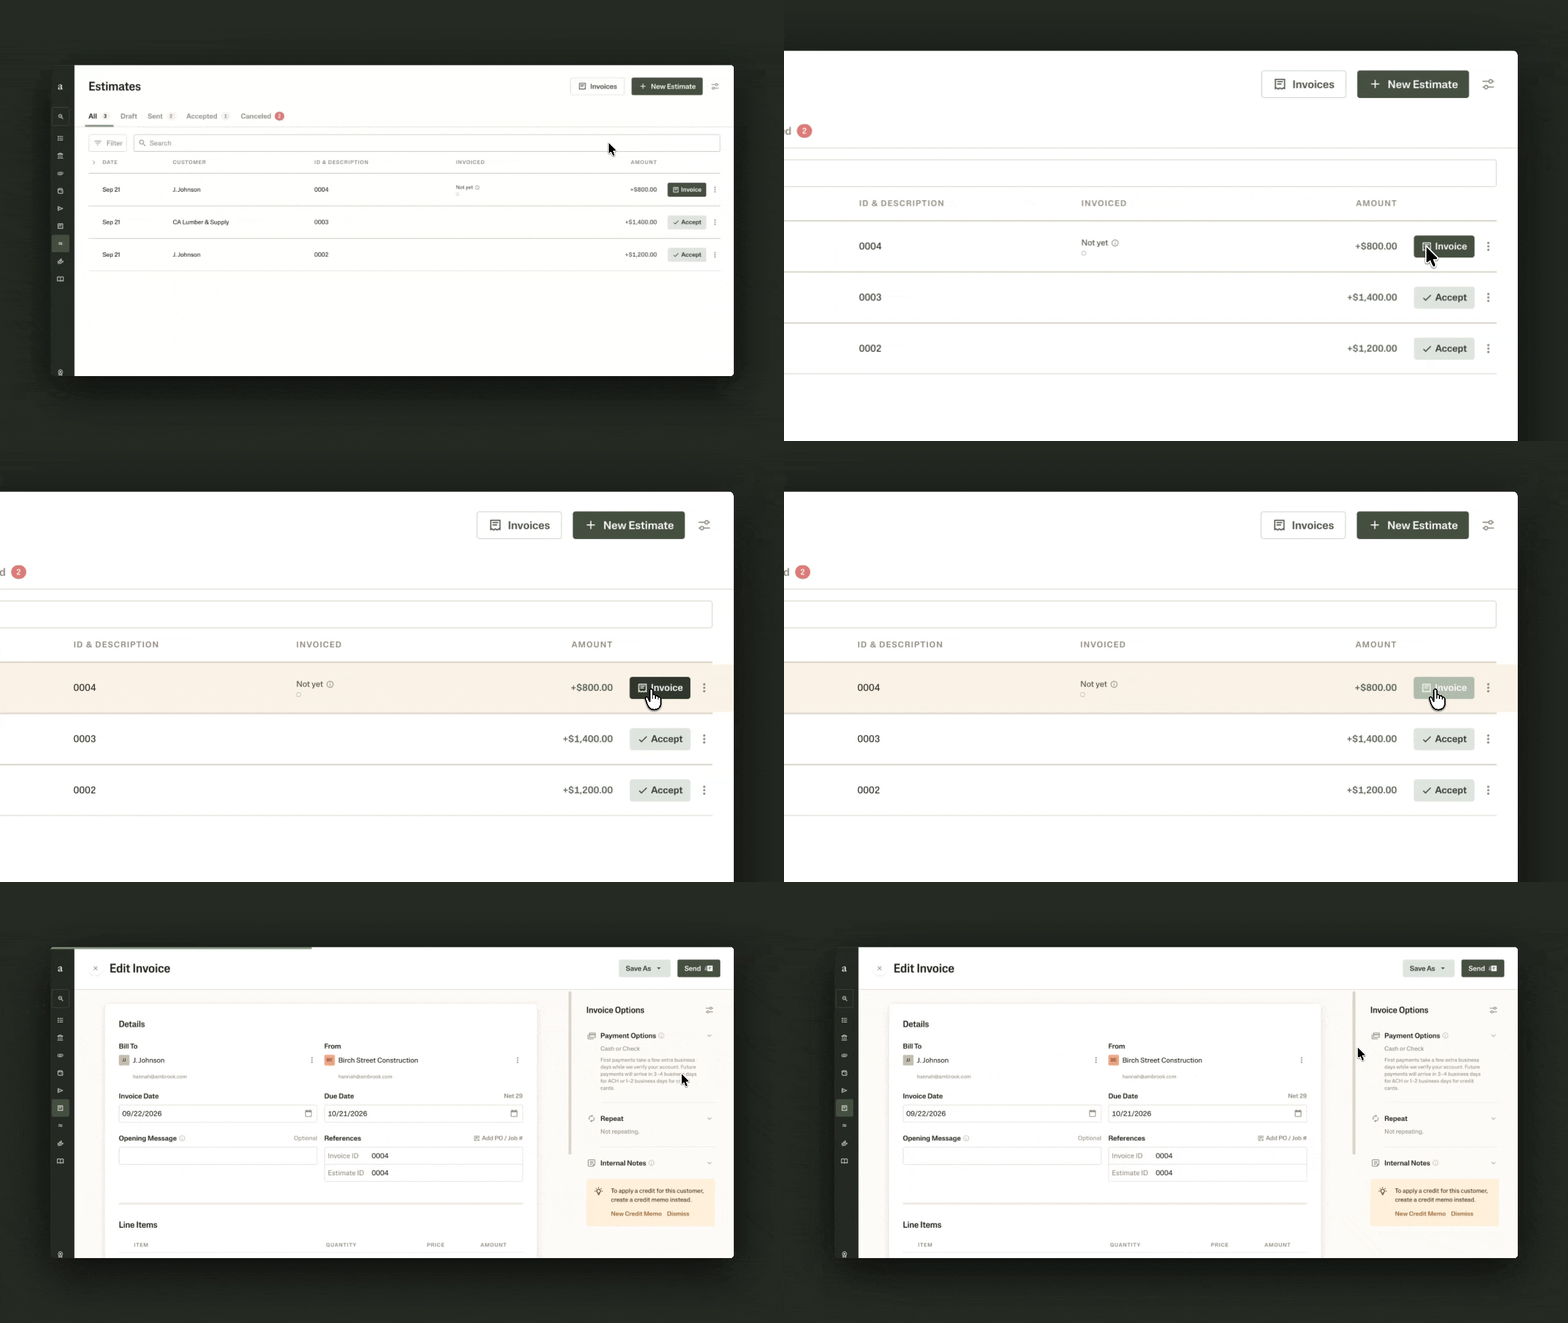
When the customer accepts your estimate, you’ll automatically see a button on the estimate’s line that says Invoice.
Clicking the button generates an invoice with the same line items and customer contact info as your original estimate. It also attaches the estimate PDF directly to the invoice.
If you’re planning to bill out partial amounts as you work on the job, you can edit the invoice to remove or change certain line items.
Just like with the estimate, click Send once you’re ready to review and send out the invoice to your client.
Similarly to the Estimates dashboard, you now have a dedicated place to track your invoices, from drafts to paid. You can check the Invoices tab regularly to see which customers you’re waiting on for a payment or who to nudge about an overdue invoice.
Step 5: Do More with Your Estimates System
Now that you’ve set up a workflow with saved line items, a way to send estimates out, and a place to monitor documents in different stages, here are a few ideas to help you get even more use out of your estimates system.
Keep track of work orders. The crew at WhiteWater Ranch uses the Estimates view almost like an informal project tracker. Accepted estimates represent open work orders and the pipeline of jobs they’re working to fulfill.
Use AI to monitor pending estimates. Some operators use AI tools to get a quick, weekly status update on their books, unpaid bills, and open invoices. You could set up a similar AI skill that helps you check the Ambrook dashboard for pending estimates each week and flags which clients you need to follow up with.
Having a well-oiled process for creating estimates and tracking them means you’ll have more time to do the job without worrying about getting paid.
Resources to Dive Deeper
Learn more about accounts receivable (AR) and your incoming payments. Invoices, including keeping track of outstanding ones, are part of AR.
Explore estimates more in Ambrook.
In a recent live webinar, we demoed how invoicing works in Ambrook.
FAQs
Are an estimate and an invoice the same thing?
No. An estimate is your best, approximate calculation of what a job will cost. You send it before starting the job to get the client’s approval. An invoice, on the other hand, is sent out after the client has approved the estimate. It’s how you officially collect payment from the client during or after the work is completed.
Estimates and invoices usually share the same line items, though, which is why systems like Ambrook can help you directly convert estimates into invoices.
How do I convert an estimate directly into an invoice?
Your invoice typically has the same line items as its matching estimate (the exception being if you bill out the job in stages, in which case the invoice may not have all the line items on the estimate). If you use spreadsheets or docs to create invoices, that means you can copy over most of the estimate to create an invoice. If you use software like Ambrook, the system will automatically generate the invoice based on the estimate.
How do I estimate the cost of a job?
For an estimate, you’ll usually include direct costs like materials, labor, subcontractors, or job-specific equipment. Then, operators will add fees, taxes, and account for overhead and margin.
Can I bill in progress before the job’s done?
Yes. On longer jobs, progress billing lets you invoice a percentage of the job, select line items, or a set amount of the job as you go. In Ambrook you can convert an accepted estimate into an invoice for a partial amount, including only certain line items from the original estimate.
What’s the difference between an estimate, a quote, a bid, and a proposal?
An estimate is an approximate cost that can change, while a quote is a firm price for the job. A bid is typically a more formal offer where you’re competing against other vendors for the same job, and a proposal generally includes more written details on job scope, terms, or approach.
This resource is provided for general informational purposes only. It does not constitute professional tax, legal, or accounting advice. The information may not apply to your specific situation. Please consult with a qualified tax professional regarding your individual circumstances before making any tax-related decisions.