

Make it easy for your entire crew to track expenses and stay on top of receipts.
Introduction
Expense tracking can be an overwhelming task. When you’re going from the gas station to the lumberyard to the job site and back again, receipts and records easily get lost in the shuffle. But keeping tabs on expenses is essential to understanding your profitability and preventing some of the bookkeeping stress that can creep up at year’s end.
In this lesson, we’re covering five steps to set up a simple expense tracking system. We’ll talk about tools and techniques to help you manage spend across your crew, log receipts at the time of purchase, and automate parts of the record-keeping process.
Step 1: Create Your Categories and Projects

To run a smooth expense tracking machine, first you need a way to log what each of your transactions was for and which job it contributed to.
Categories tell you what an expense was for. Was it fuel, materials, or equipment? You define them for your business as part of the chart of accounts, which we’ve covered in a previous lesson: Learn how to define categories for a construction chart of accounts.
Projects tell you which job an expense was for. Did you purchase materials for the 31 Main St deck or the 743 Pine Ave patio? We previously wrote about how to create a project tracking system, which allows you to clearly see job profitability and margins down the line: Review how to set up projects.
Whether they’re tags in Ambrook or a list in a spreadsheet, categories and projects are the infrastructure that make the rest of expense tracking faster and simpler. They give you a clear structure to follow, so when you’re recording an expense at the supply store or about to leave the gas station, it takes just a few seconds to choose the right project and category.
Step 2: Define a Policy for Crew Expenses
Now you’ve got your foundation set up with projects and categories, but how do you build structure for spending and expenses across your team?
As your crew grows, maybe you’ll have crew leads picking up supplies or team members making other business purchases independently. You may want to create a policy to help employees understand how they can contribute to good expense tracking.
Here are a few questions to help you get started:
Is there a budget or limit to how much you’d like crew members to spend on business expenses? Does this change depending on their role or the job?
How should crew members request reimbursements?
How should crew members send you receipts? Do you want them to send you receipts within a certain window of their purchase?
Note your answers, then share the policy with your crew so the whole team is on the same page about expenses and record-keeping.
You can also use tools to manage crew spending and expense policies. For example, many Ambrook customers use Ambrook Wallet and spending cards to do this. Wallet is a business cash account that owners fund; then, they can issue individual cards to crew members and set spending limits directly in the platform. Every card’s transactions flow into the operation’s general ledger, so owners can keep track of crew expenses in real time.
Step 3: Digitize Receipts When You Make the Purchase
With your crew all set to make business purchases, you’ll need a way to track down all of the receipts that come with them.
This can quickly get tedious if you’re gathering and storing paper receipts, so consider developing a plan to digitize them. Maybe you create a shared storage location and remind crew members to take photos of receipts within a day of their purchase.
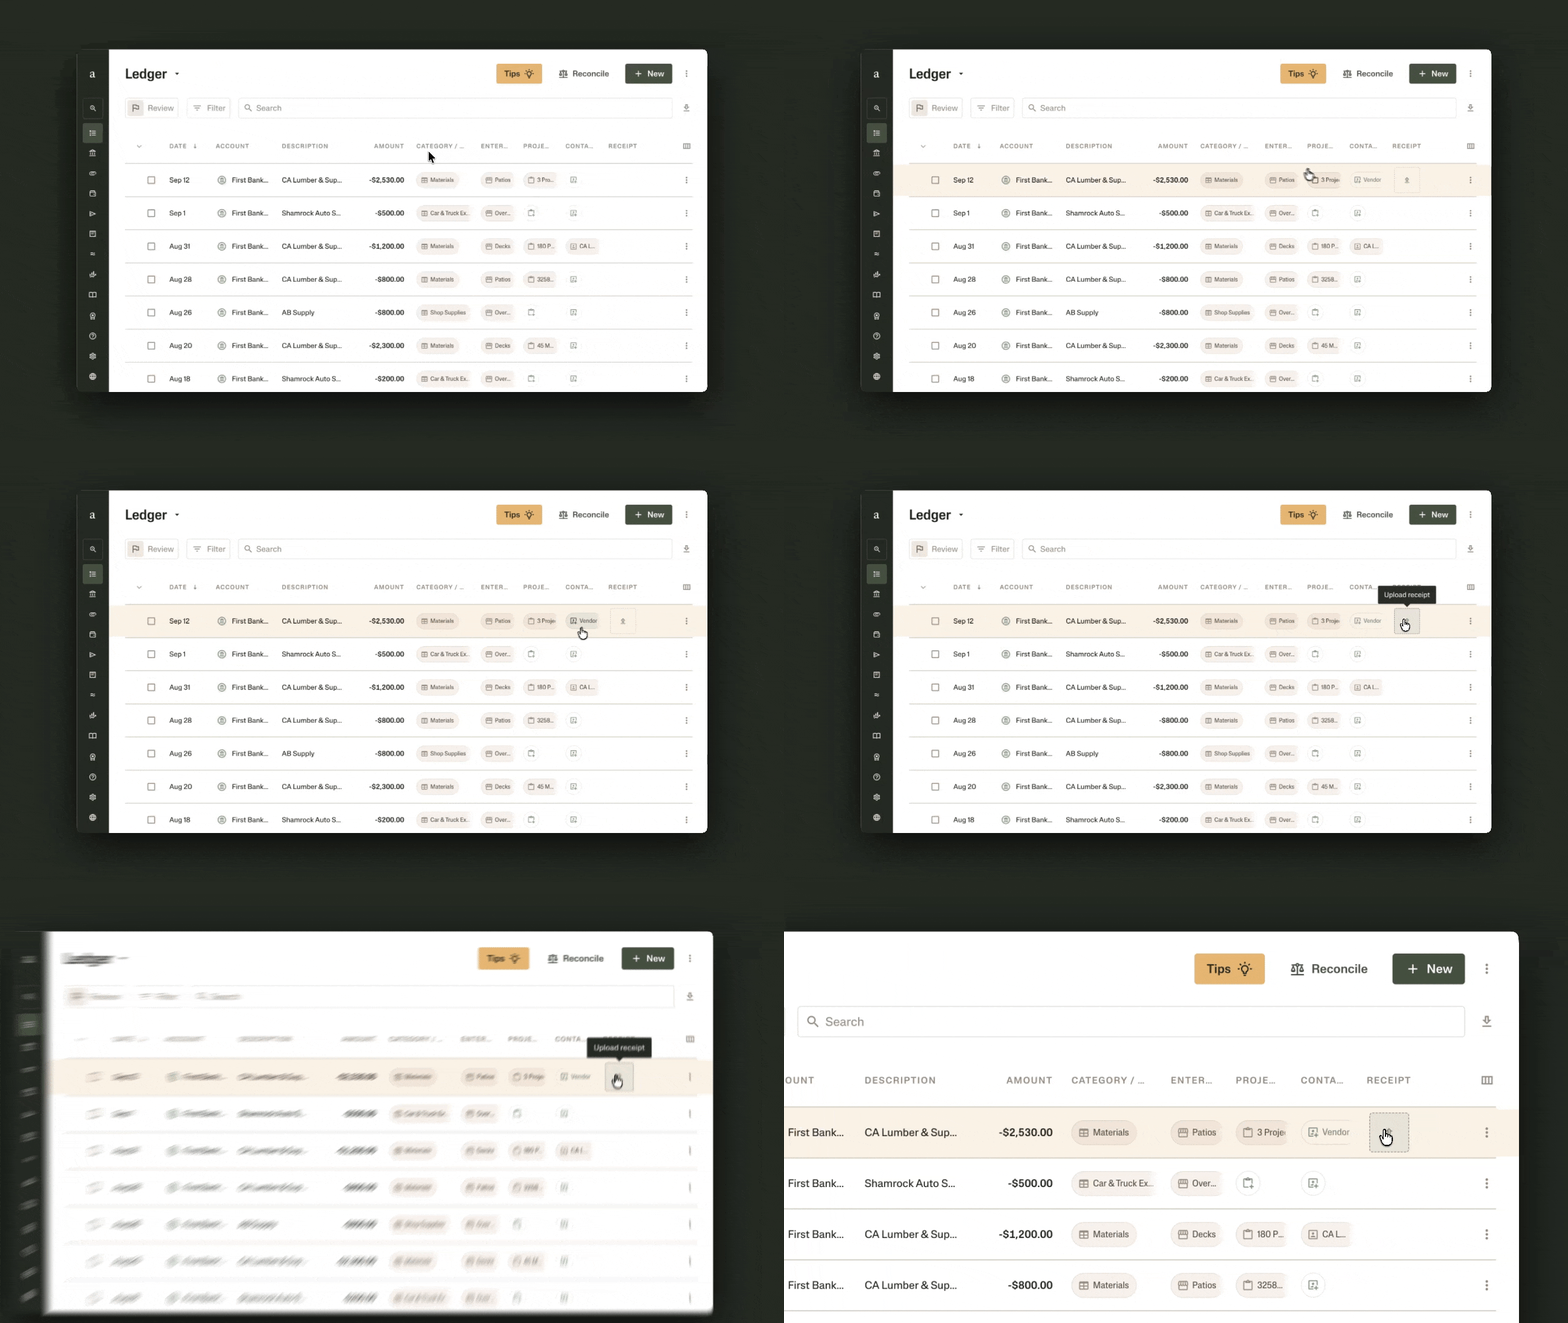
Alternatively, this is another place where software tools can come in handy. In Ambrook, for instance, crew members can upload receipts directly into the platform. Card users also get an email or app notification as soon as they charge their card, which acts like a built-in reminder to upload the receipt right away.
Read more about how Roper, owner of Bottom Line Fence, uses Wallet and spending cards.
When you create a process where the whole crew can log and share receipts at the time of purchase, you won’t have to sort through a paper pile-up or spend part of every month tracking down receipts.
Step 4: Categorize Expenses Right Away
Logging receipts is a big part of expense tracking, but so is making sure you organize those transactions themselves. This is where the categories and projects from Step 1 come into play.
With your categories and projects clearly defined, make it easy for your whole crew to tag their expenses right away, wherever they are. If you work out of spreadsheets, maybe this means sharing a list of categories that the team can reference from their phone and use to jot down the right ones.
Similarly, in a platform like Ambrook, many operators use the mobile app to open their ledger and directly tag transactions when they come in. This way owners and crews can handle categorization in a few seconds, from the parking lot or the job site, without waiting for untagged expenses to accumulate over time.
Step 5: Review Regularly and Set Automations
By now you’ve set up an efficient system to immediately capture receipts and tag business expenses, even when you or your crew are away from the desk. That said, you’ll still want to regularly review your ledger to catch any missing receipts or tags that might have slipped through.
We’ve seen Ambrook customers take things one step further by automating parts of the expense tracking process. For example:
Many operators set up tagging automations so the system can recognize a recurring expense and categorize it for them.
AI suggestions make it even faster for KB Building & Supply to tag transactions. Instead of going into each one to look for the right tags, the team can just review and approve the suggested ones.
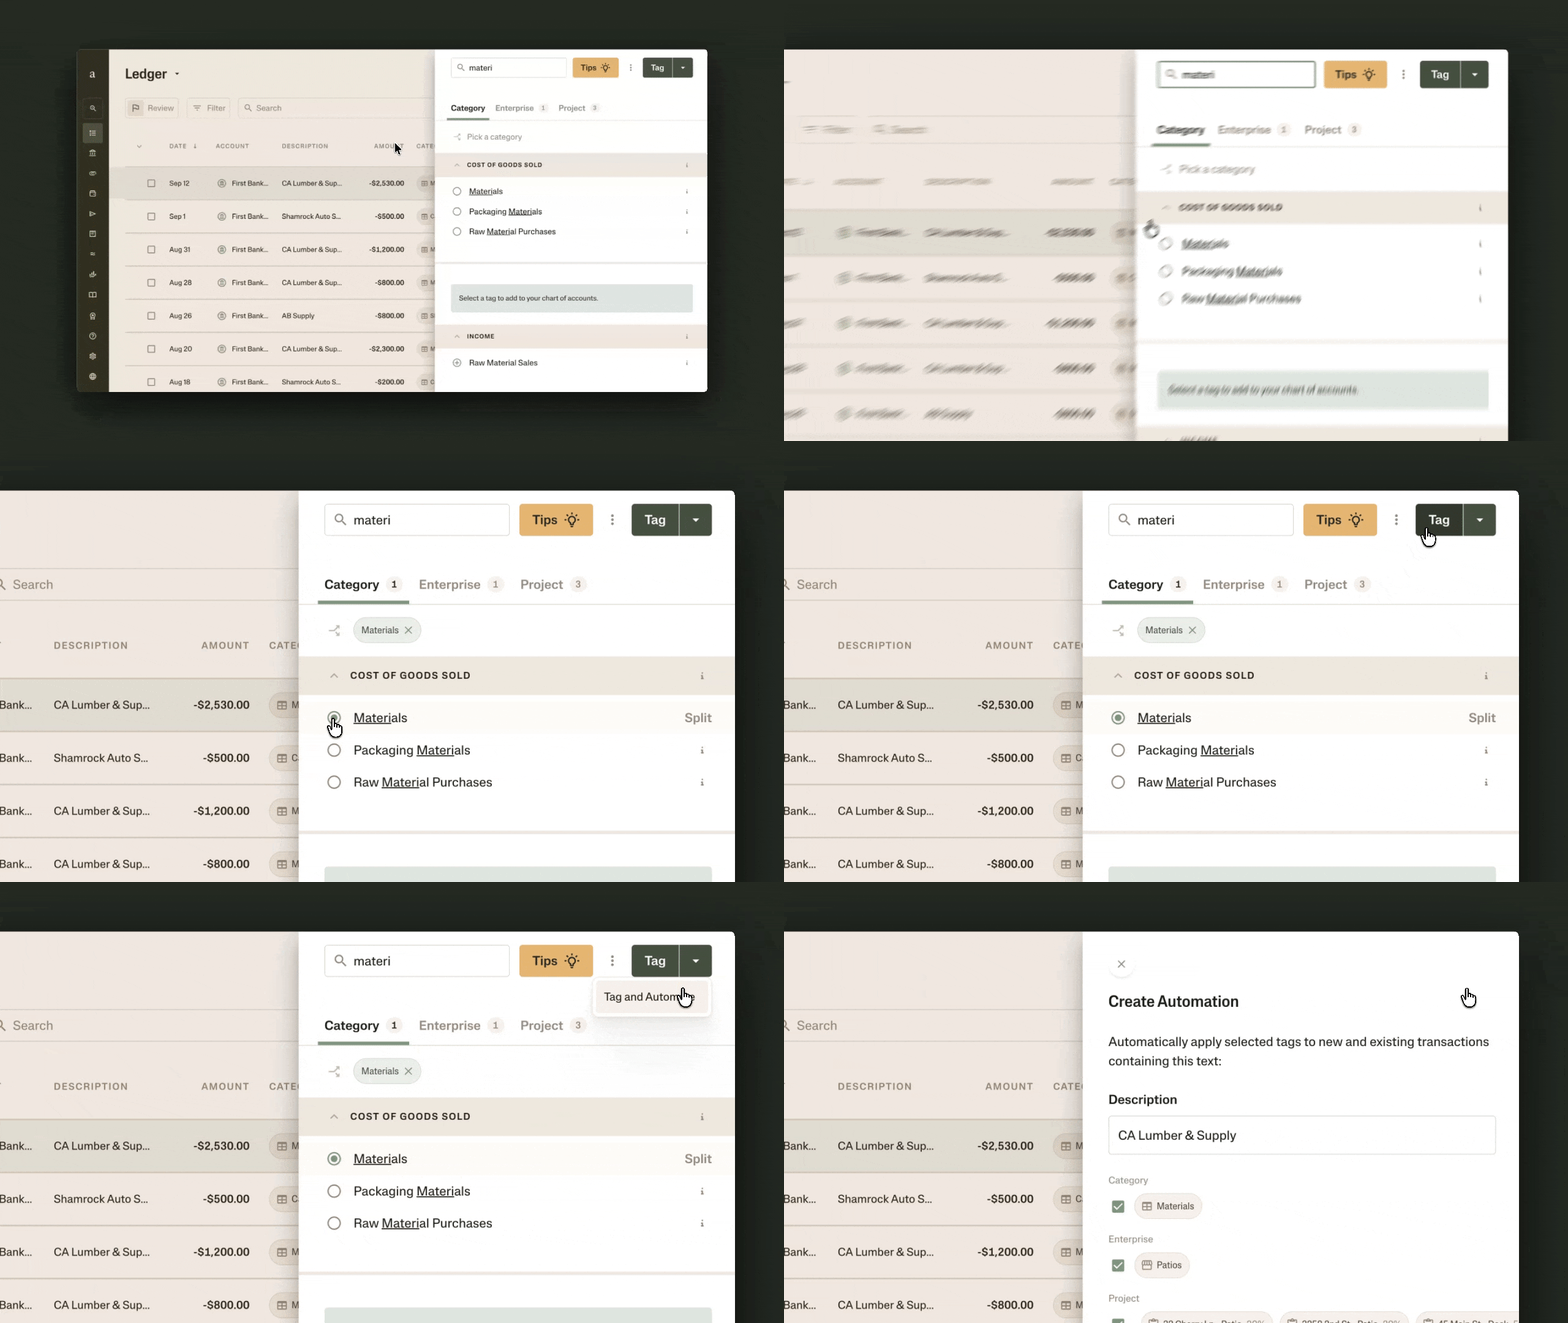
Whether it’s creating automations to tag transactions or building a rhythm to upload receipts, with a clearer process for expense tagging, record-keeping becomes an easier task and you can focus on growing your business.
Resources to Dive Deeper
Review how to set up your chart of accounts, with categories for your income and expenses.
Explore how receipt management works in Ambrook.
FAQs
What counts as a job site expense?
A job site expense is typically any cost you take on to complete a specific project. That could be materials, equipment rentals, permits, or supplies, for example.
How do contractors track expenses by job?
You can use tools like Ambrook that let you set up projects, then have crew members tag transactions to the job when they make business purchases. Once job expenses are tagged, you can keep track of project-level profitability and margins.
What’s the best way to keep track of receipts for a construction business?
Paper receipts can be easy to lose, especially as you’re traveling between different locations for different jobs or purchases. Consider setting up a system where you and your team can capture receipts digitally at the moment of purchase, then store them in a shared place. Or, you can use software tools like Ambrook that let you upload receipts and match them to transactions.
Should I give my crew company cards?
If you have crew leads or other team members who regularly need to buy materials, fuel, or supplies independently, individual cards could be a good idea. Some cards let you set spending limits as an owner, and you can also freeze or cancel cards if needed.
This resource is provided for general informational purposes only. It does not constitute professional tax, legal, or accounting advice. Consult a qualified professional about your specific situation.


